Friday, 4 December 2015

Blog Post 7

This was the diagram I followed when lighting experimenting with 3 point lighting in my office set. I wasn't pleased with the results I got, however that could be attributed to the toon shader that was enabled on the character.

It think it would be worth repeating my tests with 3 point lighting using a different model with standard textures.

Tuesday, 24 November 2015

Blog Post 6

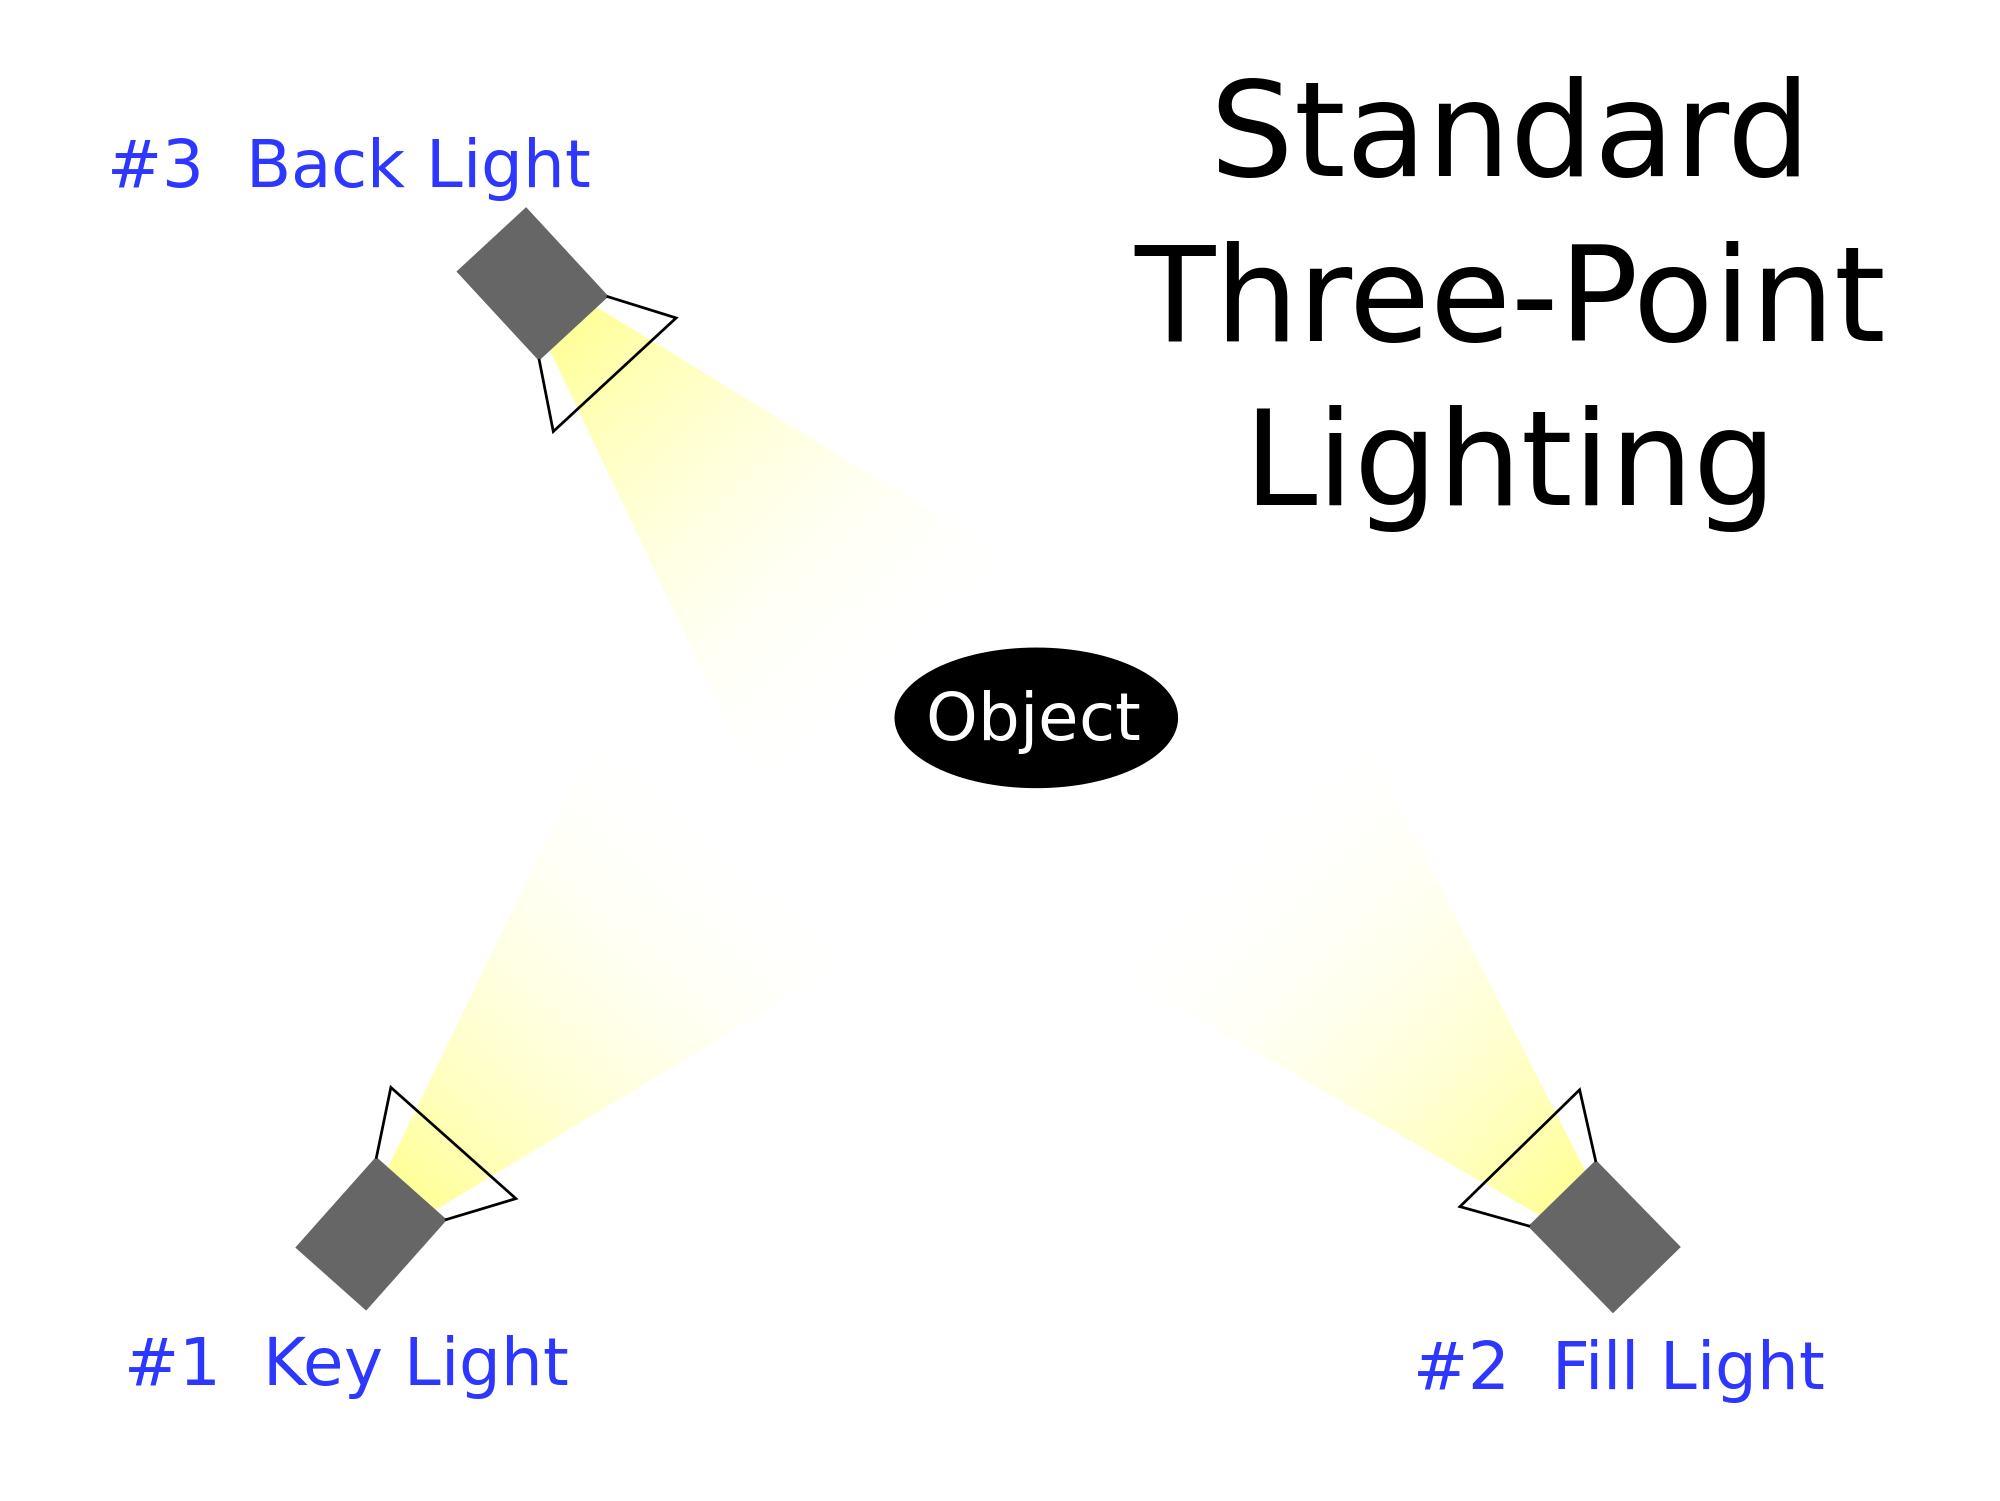
I was experimenting with 3 point lighting, I placed the brightest light pointing directly towards the front of the model, a fill light was placed to the right of the model which was about 0.8 times dimmer than the fill light. I put a background light in to seperate the character from the background, this light was approximately half as bright as the main light.


This scene took place in the office environment I created, I removed all ambient light and the original point light from the scene.

This image was rendered in Mental Ray.

Sunday, 15 November 2015

Blog Post 5

This is the same scene as the previous post, I wanted to experiment with lighting the scene with a character inside it. I put a toon shader onto this model in order to experiment with how it reacts to ligthing.

I completely removed the ambient light for this shot but kept the point light in the same location.

There is an issue with either the renderer or the lighting on the wall as I don't understand why a big patch of the wall is lit so brightly.

This image was rendered in Mental Ray.

Friday, 6 November 2015

Blog Post 4


This is an environment I modeled for my Modelling, Lighting and Rendering assignment. This scene is lit by 2 lights, there is a dim ambient light in the centre of the room that is out of frame and outside of the window is a much stronger point light that is used to cast the shadows from outside it.

The scene was rendered using Mental Ray in Maya.


Tuesday, 27 October 2015

Blog Post 3


 I wanted to take advantage of this mask I bought to decorate my room but taking some shots of it. I took multiple from different angles and utilizing the flash on the camera. I decided on this one since I liked how the flash of the camera fell on the reflective material of the mask.

Unfortunately there is some scratching on the paint so that I felt I dead on shot of the face would simply not work.

Taken on a Samsung Galaxy S5
2MP with Flash.


Tuesday, 13 October 2015

Blog Post 2


I orginally took this photo for a personal project that Santosh and I wanted to try and undertake, we were going to cut out the middle of the bridge and replace it with a green screen on which we were going to super impose a background with a large godzilla type monster onto it.

Speaking of the photo itself, I am fond of the fact that both the background and bridge itself are in focus however this was entirely accidentely.

Taken on a Samsung Galaxy S5 with 2MP camera.

Blog Post 1

This image is a mid shot that was taken at a low angle. Since I was wearing a suit which is an item of clothing that is often associated with power and success I took the photo at a low angle in an attempt to project that feeling of power.

I took advantage of the grey sky since we were taught that it was the best time to get photo textures so I thought that it was worth trying to see if it applied to photos of people.